Integrate with Sitecore
Sitecore provides an end-to-end composable digital experience platform, empowering brands to make unforgettable connections with their customers.
In this article, you will learn how to set up a connection and publish to Sitecore via the Kapost App Center.
The Kapost Sitecore integration requires the 'Sitecore Authoring and Management GraphQL API,' which is typically not enabled by default in new Sitecore installations. Please refer to the Sitecore documentation on how to enable this feature.
Creating the Connection
- Log into the App Center Tab.
- Click the Install more apps button below the list of current connections.
- In the Kapost App Center, search for Sitecore and click on the product tile.
- From the Select Instance drop-down menu near the bottom of the expanded tile, select your Kapost instance and click Install.
-
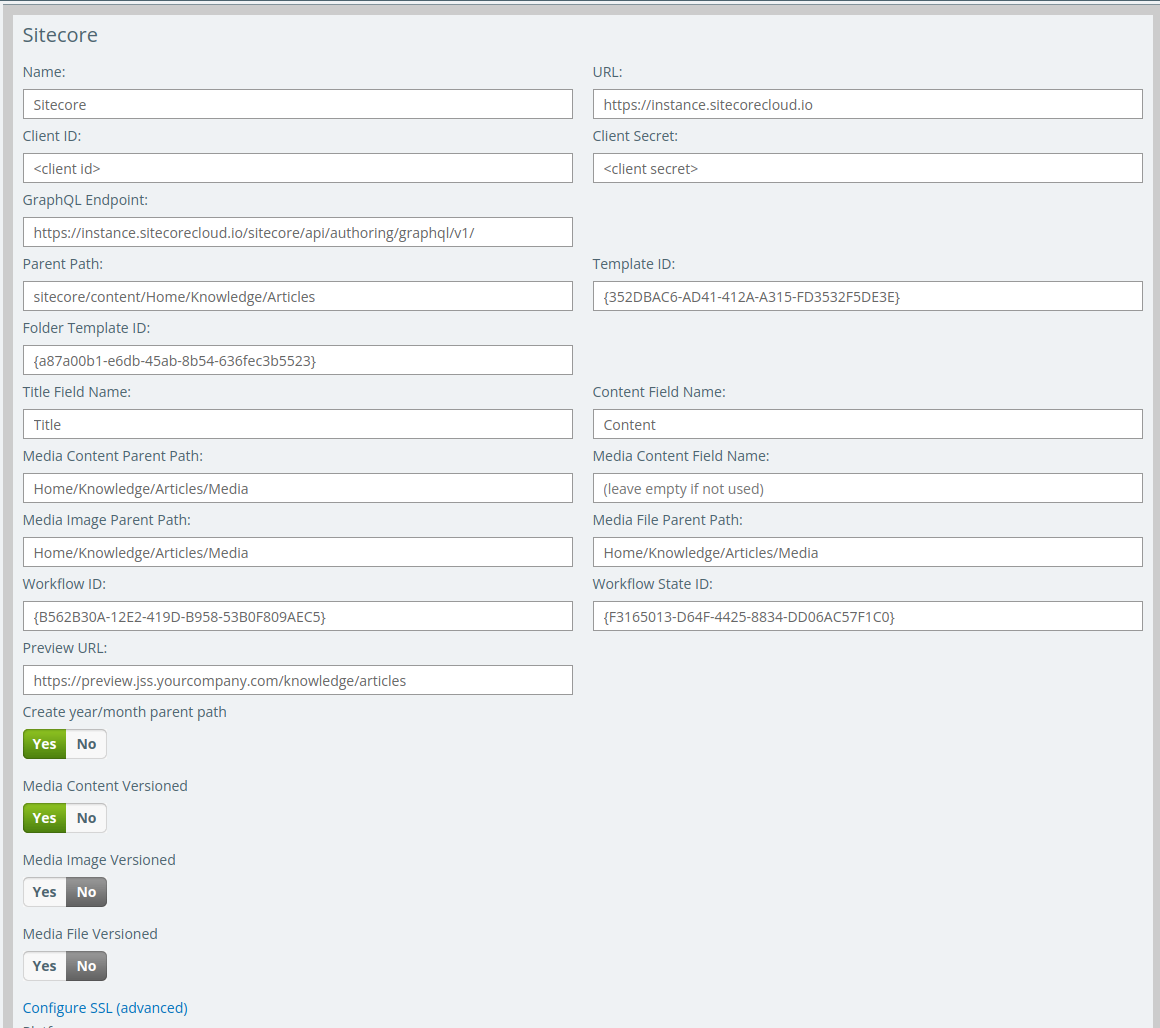
You will see the Kapost App Center settings page once again, now with a connection panel open.
-
Enter the required details:
-
Name - You may name this connection anything. The name is purely to distinguish this connection to Sitecore from other publishing destinations you may have set up.
-
URL - Enter the base URL of your Sitecore Author instance, e.g. if your login URL is "https://author.mycompany.com/sitecore/login", then you must enter "https://author.mycompany.com".
-
Client ID and Client Secret - Contact your Sitecore developers to generate and obtain the Client ID and Secret pair.
-
GraphQL Endpoint - This URL is generally composed of your login URL along with "/api/authoring/graphql/v1/". Contact your Sitecore developers to obtain this.
Example: https://instance.sitecorecloud.io/sitecore/api/authoring/graphql/v1/
-
Parent Path - The path under which all content published to Sitecore will be created or updated.
Example: "sitecore/content/Home/Knowloedge/Articles".
-
Template ID - GUID of the template you would like the Integration to use when creating content items inside Sitecore. This field can be left empty if you want to configure this on a per content type basis instead, e.g. {352DBAC6-AD41-412A-A315-FD3532F5DE3E}. Refer Setting up Content Types for more information.
-
Title Field Name - The field name in the Sitecore is equivalent to the title field in Kapost. This field can be left empty if you want the integration to use a custom field instead, e.g. "Title". Refer Setting Up Custom Field Mapping for more information.
-
Content Field Name - The field name in Sitecore is equivalent to the HTML content body field in Kapost. This field can be left empty if you want the integration to use a custom field instead, e.g. "Content". Refer Setting Up Custom Field Mapping for more information.
-
(Optional) Preview URL - You can customize to what must be presented to the users in Kapost on the content details of each piece of content that have been published to Sitecore.

Note:
-
A typical preview URL would look like this: 'https://preview.jss.yourcompany.com/knowledge/articles'.
-
Create year/month parent path - Turn this option On if your content lives under a "year/month" structure like: https://preview.jss.yourcompany.com/knowledge/articles/2024/05/my-article. When this option is turned on, Kapost will automatically create the parent year and month during the publishing process.
-
-
-
Click Connect to establish the connection.
Tip: The integration will display an error and the connection will be disconnected if errors are found.
Media Support
Some additional fields to map will also show up which needs to be filled out to enable media support.

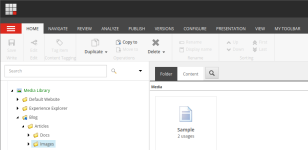
The Media Content Parent Path should be set to a path inside Sitecore’s Media Library where all the media content will go when the integration is used in conjunction with a Content Type in Kapost that has a document or a file body.
The Media Content Field Name must be set to the field name in Sitecore that is equivalent to the File/Document body in Kapost. You can also leave it empty if you prefer the integration to use a custom field instead. Refer Setting Up Custom Field Mapping for more information.
Both of these have to be filled in order for the integration to work with Kapost content types that have a document or file body. You have an option to leave the field empty.
The Media Image Parent Path and Media File Parent Path is set to a path inside Sitecore’s Media Library where all inline images, image and file custom fields should transfer over during the publishing process.
The Media Content Versioned, Media Image Versioned and Media File Versioned controls whether the media of each type must be versioned or not when published into Sitecore’s Media Library.
Note: You can toggle any of these if you need versioning, otherwise leave them on their default value, which is no versioning.
What does this mean in practice? Image and file custom fields as well as inline images do not transfer into your Sitecore’s media library and you will not be able to use the integration with Kapost Content Types that have a file or document body.
Once everything media related has been configured, click Save button to persist all the mappings.
Tip: Do not forget to set publish permissions on the connection by clicking on “manage publish permissions”.
If you want to publish to multiple locations within your Sitecore content tree, then you can connect multiple times and adjust the “Path” mappings above to different paths as necessary, as well as set different publish permission for each connection. This can be useful if you have multiple groups or teams where each should only be able to publish to their own designated locations in Sitecore.
Setting up Content Types
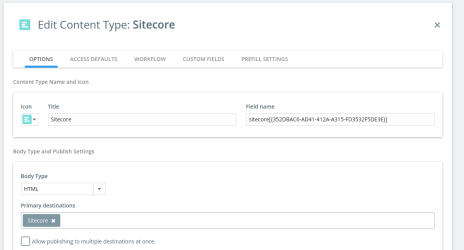
Once the integration has been set up in the App Center, it is necessary to add Sitecore as a Primary Destination for one or more of the desired content types.
In addition to this, each content type published to Sitecore needs to be mapped to the corresponding Sitecore template, otherwise the default template ID will be set on the connection(s) in the App Center. This is done by navigating to Settings > Content Types & Workflows and set the “Field Name” in a similar format to the one used when mapping custom fields, except that the value between the […] is the Item ID of the desired Sitecore template, e.g. sitecore[{352DBAC6-AD41-412A-A315-FD3532F5DE3E}].
Note: You can use prefills to set a default value for the custom fields. To learn about configuring prefills, refer to Prefills On Content For Admins.
How to find the Template ID in Sitecore
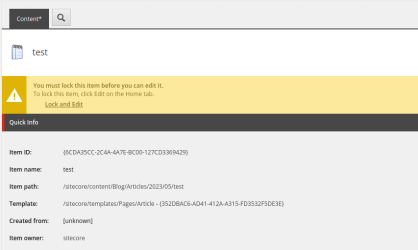
The ID {352DBAC6-AD41-412A-A315-FD3532F5DE3E} can be found in Sitecore by identifying the desired template and then copying its ID, including the curly brackets around it.
The easiest way to identify the template is to look at an existing content item inside Sitecore and then find the metadata that looks like “Template: /sitecore/templates/Pages/Article - {id}”.
Inserting Inline Images
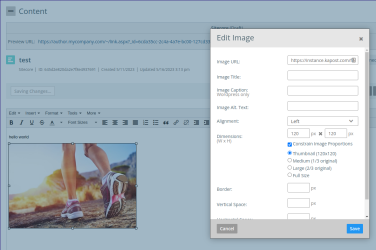
Users can insert images inside the main WYSIWYG editor on content types with an HTML body type. This is done through the Insert/Edit Image tool that is present in the toolbar.
Once an image has been inserted users can select the image in the editor by clicking on it and then click the Edit Image button either on the image itself or the toolbar. This will open a popup with image details which allows them to set the alt text, size, alignment, border and padding.
From admins, for best compatibility with Sitecore the Set image size with CSS for images inserted into text editor setting should be turned on in Settings > Content. Reach out to your CSM if you do not see this setting.
Publishing
Publishing to Sitecore is no different than publishing to any other destination, with one important difference that it is only possible to publish as a draft. This is because the integration works exclusively with the Sitecore Author instance and the final publishing to live must be done inside Sitecore itself when the time is right.
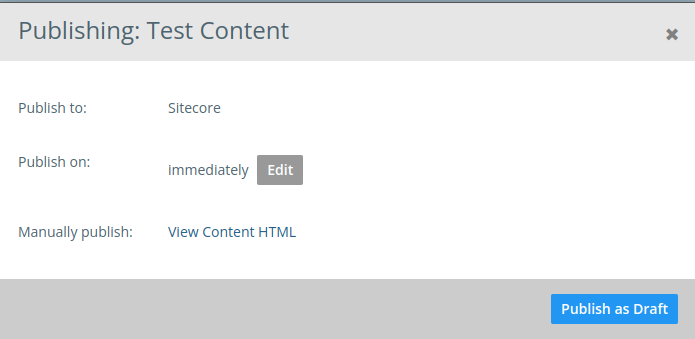
After the initial publish, the Preview URL will appear at the top of the content details. If there was an error during the publishing process, users will see that instead of the Preview URL. It is also possible to republish which will update the existing content item created in Sitecore.
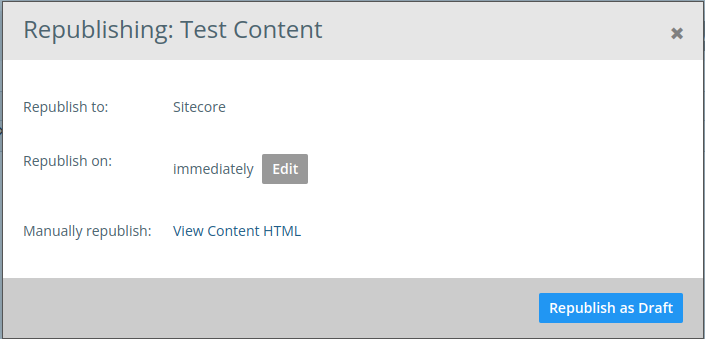
Once it has been republished, the content item needs to be published again inside Sitecore.
